Sunday, May 11, 2014
Gardening and Immediacy
I'd been reading a lot of Facebook posts recently by experienced gardeners scoffing at newbies for infractions like buying tender annuals too early or buying tomato plants far before it's time to plant them. Though I'm experienced enough to also know these novices are wasting time and money, I am also a spur-of-the-moment, or haven't-totally-thought-it-through-but-I-wanna-do-it kind of person. Some may call it impatience, but I believe it's the sheer excitement of gardening taking over, and it's a feeling I wouldn't want to lose. I wrote about it here for the popular Garden Rant blog. What are your thoughts?


Sunday, May 4, 2014
Beef, bison, lamb, goat, and turkey jerky

As some of you might know, each year, my husband, sister, brother-in-law and I do a secret Santa gift exchange (which almost never happens at the holidays). The only catch is that the gift has to be homemade. I originally thought it'd be an awesome deal for me because it would significantly reduce the number of gifts I would need to think up to give my husband.
Except for the fact that I keep drawing his name year after year - grrrr!!
This year, I decided to try my hand at making jerky. But not just beef, I made all the variations below:
- Bison with wasabi teriyaki (store bought marinade)
- Beef with a smoky classic marinade (worcestershire sauce, soy sauce, honey, onion powder, liquid smoke, ground black pepper, red pepper flakes)
- Turkey (soy sauce, honey, sesame oil)
- Goat (red wine, white vinegar, mint, onion, hot sauce, soy sauce water, olive oil)
- Lamb (onion, cumin, turmeric, garam masala, curry powder, cardamom pods, tomato paste, salt, water)
 |
| Everything but the kitchen sink in these marinades |
The basics of making jerky:
- Slice meat along the grain about 1/3 inch thick, as evenly as possible. Partially freezing your meat first will make it easier to cut nice even slices.
- Marinate your meat overnight.
- Drain marinade and pat meat strips dry.
- Dry on highest setting (about 160F) for about 6-8 hours. Meat should be leathery and pliable, but will be dry, chewy, and stringy when pulled apart.
Store in an airtight container and use within a month or two (though I assure you it will be long gone by then!).
Wednesday, April 23, 2014
How to grow microgreens
 |
| Beet microgreens - research proves microgreens are supernutritious |

STEP 1: Heavily sow seeds onto shallow tray (with drainage holes) of soil. Cover with a fine layer of soil.

STEP 2: Daily, mist until soil is completely moist.

STEP 3: Harvest in about 10-14 days by snipping just above the soil line.
 |
| Microgreen salad mix: sunflower greens and radish greens - served with goat cheese medallions |
Tuesday, April 15, 2014
I made a simple request. Please water my seedlings while I'm away for 3 days.
It was just about 3 days! And I came home to this...

Sigh...
Thursday, April 10, 2014
Everyone: look at my hellebores!


At the end of every winter, the hellebores get their simple tidying up... a few minutes per year of care, and...


...voila! Really. I can't think of an easier, more gorgeous, carefree perennial. Shade-loving, persistent even when occasionally snowed upon, and with a form that looks like a bouquet growing straight out of the ground. And maybe also a bit because they herald spring, hellebores are probably my favorite perennials in my garden.


Sunday, April 6, 2014
Seed Starting: multi-cell seed-starting kits versus individual pots
The first time I started seeds on my own, I bought a 60 cell seed starting kit complete with a styrofoam tray that floats in a bottom tray (so you can't over or under water), a clear "biodome" to provide a warmer and more humid environment, and moist little pre-fab plugs I was supposed to simply drop a seed into. Easy as pie.
Ten days later, the tomatoes were 3 inches high and threatening to pop the biodome off, a few of the eggplant had just started to germinate, and there were no signs of life from any of the peppers. With the variety of seeds at different stages - some requiring heat, some needing to be moved under the grow lights, and some nearly needing to be potted up already, a multi-cell seed starting kit for the backyard gardener is just not the best method for seed-starting.
Recently, I bought a few 10 cell kits thinking that I could simply put a single variety of seed in separate trays to avoid the problems I had with the 60 cell kit. The idea of not worrying about watering and the ease of simply dropping a seed into a plug and then plopping that plug in the hole in the tray was so appealing.

The results? Tomatoes germinate reliably and quickly as usual. Peppers were not reliable and as seen in the photo above, it was a great waste of valuable space under the lights to keep this whole tray with just a few seedlings going. By the time I consolidated the seedlings that DID germinate by potting them up and labeling them, I could have just done it the right way from the beginning. And the tomatoes that are looking great? Well, they're quickly outgrowing the 3/4" plug and will need to be potted up. The final word on these seed starting kits? A waste of time and space. What I would consider almost a gimmick - that I fell for again.
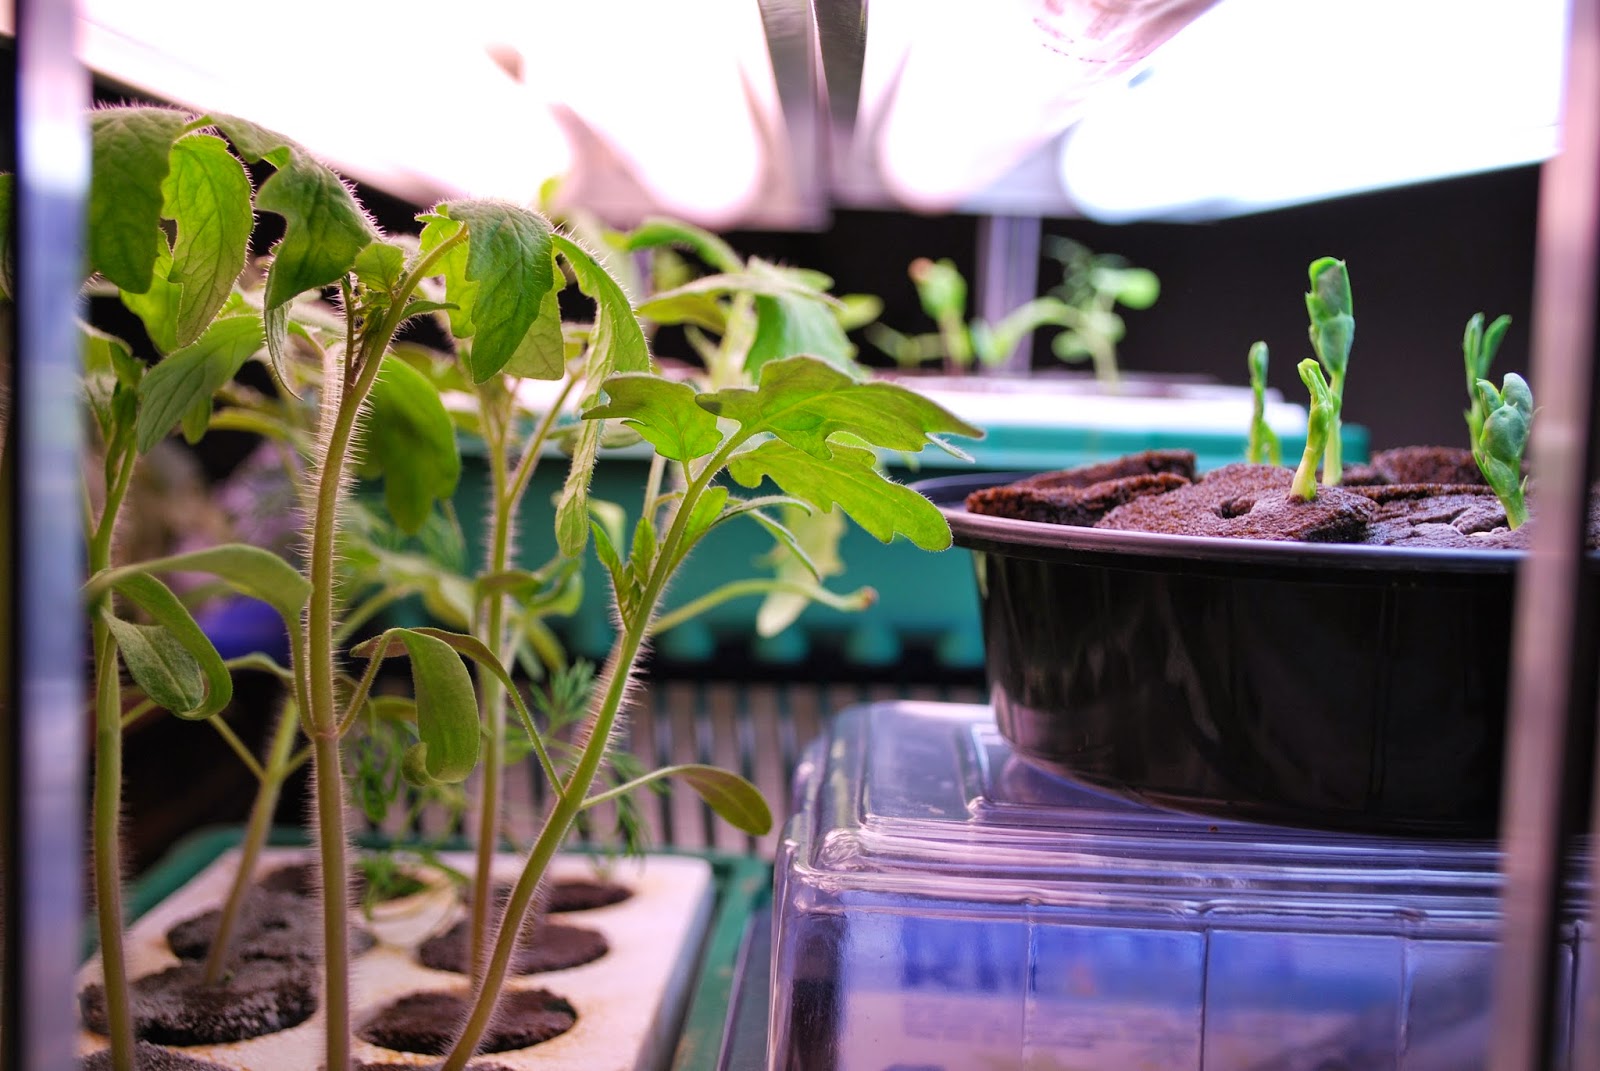
Today, I started a second batch of seedlings using the method that I've used for years prior to being hyponized by the apparent ease of the seed-starting kits. I also potted up some plants have have outgrown their tiny plugs. My hands get dirty. It's a lenthier process. I make a little bit of a mess on my kitchen table. I have to keep an eye on watering. I had to go to my local coffee shop to steal my plant markers (and to pick up a latte because this seed-starting process takes more time and energy). But it's simple and effective. I can recycle the medium-filled pots if seeds don't germinate. I can move individual pots around that are ready to go under the lights or keep pots that haven't germinated together in a warm environment or on the heat mat. My seedlings also have a longer period of time in these larger pots before they need to be potted up and most can go directly in the garden. Am I the only gardener that continually needs to learn you shouldn't try to fix what ain't broke?

Ten days later, the tomatoes were 3 inches high and threatening to pop the biodome off, a few of the eggplant had just started to germinate, and there were no signs of life from any of the peppers. With the variety of seeds at different stages - some requiring heat, some needing to be moved under the grow lights, and some nearly needing to be potted up already, a multi-cell seed starting kit for the backyard gardener is just not the best method for seed-starting.
Recently, I bought a few 10 cell kits thinking that I could simply put a single variety of seed in separate trays to avoid the problems I had with the 60 cell kit. The idea of not worrying about watering and the ease of simply dropping a seed into a plug and then plopping that plug in the hole in the tray was so appealing.
The results? Tomatoes germinate reliably and quickly as usual. Peppers were not reliable and as seen in the photo above, it was a great waste of valuable space under the lights to keep this whole tray with just a few seedlings going. By the time I consolidated the seedlings that DID germinate by potting them up and labeling them, I could have just done it the right way from the beginning. And the tomatoes that are looking great? Well, they're quickly outgrowing the 3/4" plug and will need to be potted up. The final word on these seed starting kits? A waste of time and space. What I would consider almost a gimmick - that I fell for again.
Friday, February 14, 2014
Lemon Curd recipe

I had 72 eggs in my refrigerator the other day. You'd think my father's chickens would slow down a little with the snow and freezing temps, but they're laying those eggs like gangbusters. With 6 dozen eggs in my fridge, there was little room for anything else! I quickly solicited the help of my Facebook friends. Within a few minutes, I had all kinds of ideas that required many eggs such as: quiche, flan, chocolate mousse, cheesecake, Lyonnaise salad, fritatta, creme brulee, pavlova, souffle, okonomiyaki, pound cake, eggnog, crepes, tortilla Espanola, and a couple of suggestions for egging Justin Beiber. Yes, to all of the above suggestions. But one recurring suggestion stood out - lemon curd, lemon curd, lemon curd. With anticipated snow and a probable day off of work, I had all the time in the world to make this easy recipe while canning enough to give away. I found a few recipes that sounded good, tripled it, and added a couple extra egg yolks in the end because the curd was not thickening as much as I'd liked.

Lemon Curd - makes about 3 pints
20 egg yolks3 cups sugar
about 8 lemons (Meyer lemons preferably) totalling about 1 1/2 cups of juice
3 sticks butter, cut into chunks
zest of all the lemons, finely chopped
In a heavy pot over medium heat, whisk yolks and sugar. Add lemon juice and stir gently and constantly with a wooden spoon. Do not boil. Reduce heat to low to prevent curd from boiling. Continue to heat and stir for about 15 minutes or until thickened and curd coats the back of a spoon.
Remove from heat. Add chunks of butter and stir gently until melted. Pour curd through sieve into large bowl. Gently stir curd in sieve to work curd through and catch any solids. Stir in zest.
Ladle into hot jars leaving 1/2 inch headspace and process in a boiling water canner for 20 minutes. Remove lid and let sit for another 5 minutes. Remove from canner and do not disturb while cooling. Lemon curd is shelf stable for only about 2-3 months after processing in a boiling water canner.
Amazing on some blueberry scones for breakfast!
 |
| These are gluten free and dairy free - made of an egg, almond meal, coconut flour, coconut milk, honey, and blueberries. |
With this easy recipe and all the other suggestions on my list, these chickens can go crazy with it!

Subscribe to:
Posts (Atom)