Showing posts with label seeds. Show all posts

Saturday, October 1, 2016

Heirloom Shantung jade squash


I won't wax poetically about heirloom seeds - mostly because some people can do it so much more passionately and expertly than I can, but in short, heirloom seeds - and the gardeners that preserve them - are quite amazing.  

This is a gigantic Chinese jade squash, sitting on top of a trellis in my father's garden. It has a while to go before it lightens in color and develops lovely green speckles/streaks. He's grown this squash for the past few years and loves the tender, mild taste. Later, he'll grate the pale yellow flesh and make fried squash patties or may finely chop the squash and combine it with minced shrimp and ground pork to make his famous dumplings.

Prior to these past few years though, my father had not tasted this squash since probably the early 1960's. Shortly after that time, my father made his way from rural China to bustling Hong Kong, then finally to the suburbs of the United States where he cultivated several different gardens in the backyards of several different homes.  He tried for the first time, and then subsequently grew many vegetables that a typical American gardener would grow such as tomatoes, cucumbers and summer squash.

While my father was gardening in the United States, gardeners in Shandong, China, remained guardians of this very local heirloom squash, growing them season after season, saving seeds season after season so that one day, decades later, my father would meet an old friend with a handful of seeds to share. These seeds were saved from my father's favorite squash grown back home during his childhood decades ago.  While my father may now be accustomed to tasting Chinese jade squash every fall since he's been saving seeds for a few years now, I am amazed every time I see this gorgeous thing up on the trellis from a very far off place and time. 

(cross-posted at The Chinese Kitchen Garden blog - please visit this blog to learn more about growing and cooking Asian vegetables!)

Sunday, April 6, 2014

Seed Starting: multi-cell seed-starting kits versus individual pots

The first time I started seeds on my own, I bought a 60 cell seed starting kit complete with a styrofoam tray that floats in a bottom tray (so you can't over or under water), a clear "biodome" to provide a warmer and more humid environment, and moist little pre-fab plugs I was supposed to simply drop a seed into.  Easy as pie.

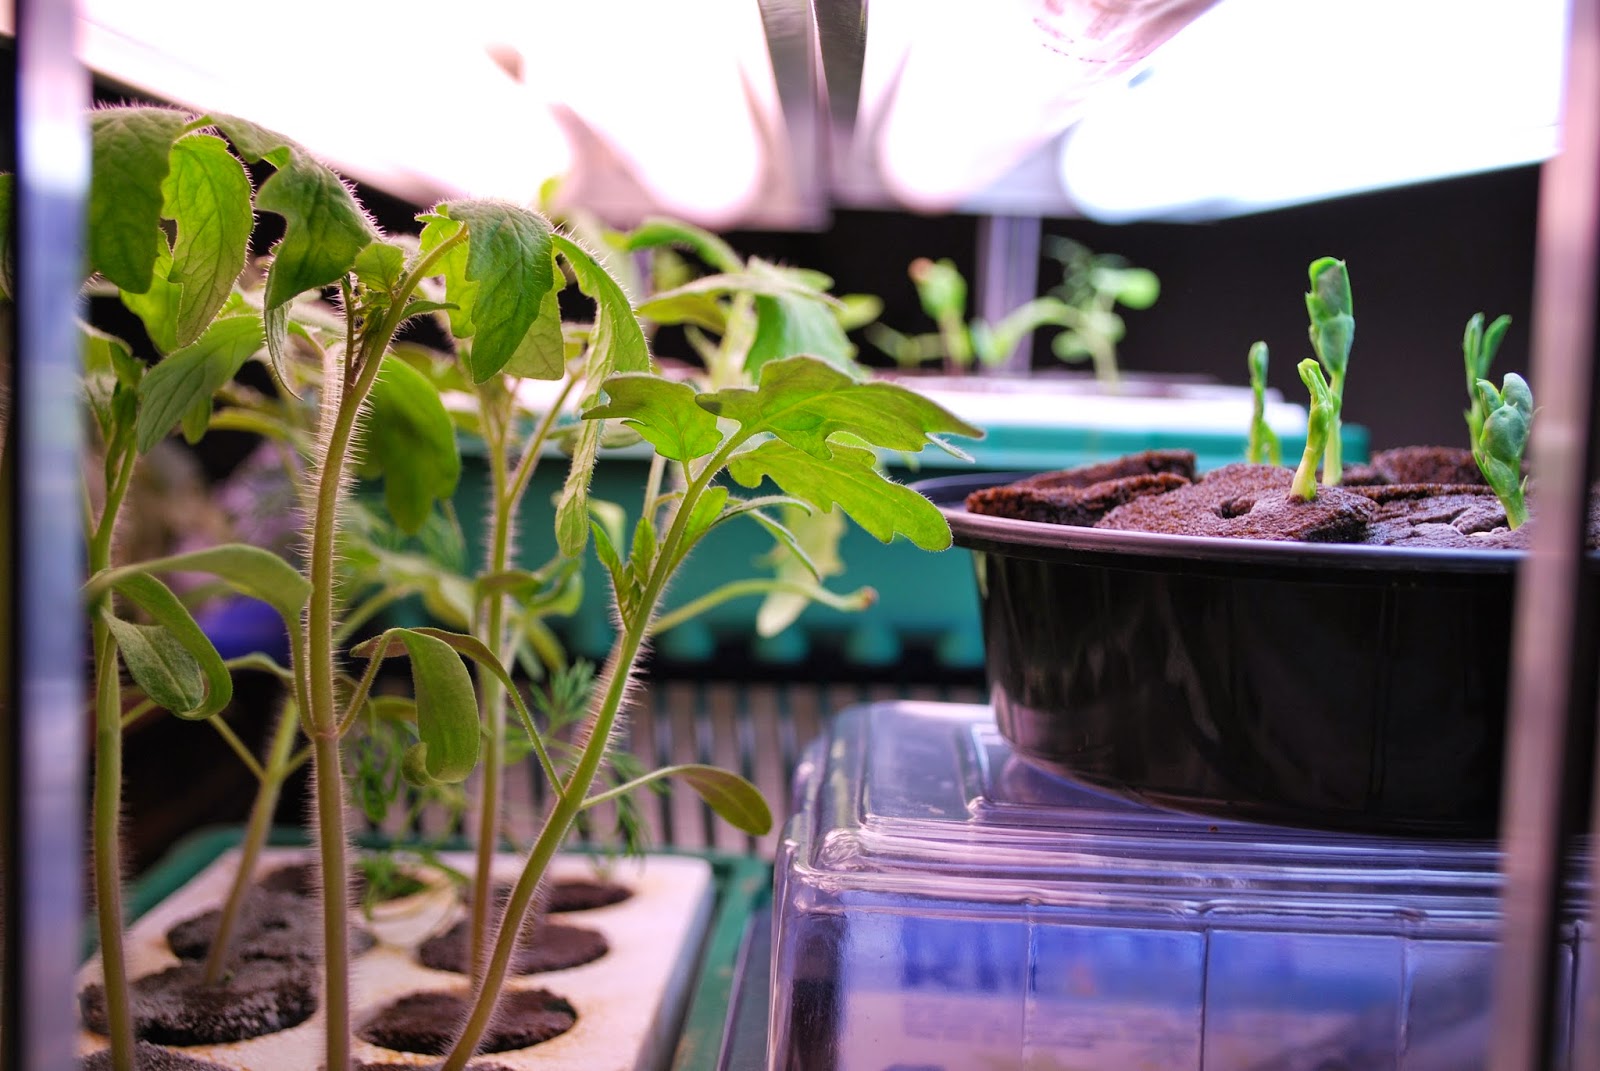
Ten days later, the tomatoes were 3 inches high and threatening to pop the biodome off, a few of the eggplant had just started to germinate, and there were no signs of life from any of the peppers.  With the variety of seeds at different stages - some requiring heat, some needing to be moved under the grow lights, and some nearly needing to be potted up already, a multi-cell seed starting kit for the backyard gardener is just not the best method for seed-starting.

Recently, I bought a few 10 cell kits thinking that I could simply put a single variety of seed in separate trays to avoid the problems I had with the 60 cell kit.  The idea of not worrying about watering and the ease of simply dropping a seed into a plug and then plopping that plug in the hole in the tray was so appealing.


The results? Tomatoes germinate reliably and quickly as usual.  Peppers were not reliable and as seen in the photo above, it was a great waste of valuable space under the lights to keep this whole tray with just a few seedlings going.  By the time I consolidated the seedlings that DID germinate by potting them up and labeling them, I could have just done it the right way from the beginning.  And the tomatoes that are looking great?  Well, they're quickly outgrowing the 3/4" plug and will need to be potted up.  The final word on these seed starting kits?  A waste of time and space.  What I would consider almost a gimmick - that I fell for again.


Today, I started a second batch of seedlings using the method that I've used for years prior to being hyponized by the apparent ease of the seed-starting kits.  I also potted up some plants have have outgrown their tiny plugs.  My hands get dirty.  It's a lenthier process.  I make a little bit of a mess on my kitchen table. I have to keep an eye on watering.  I had to go to my local coffee shop to steal my plant markers (and to pick up a latte because this seed-starting process takes more time and energy). But it's simple and effective.  I can recycle the medium-filled pots if seeds don't germinate.  I can move individual pots around that are ready to go under the lights or keep pots that haven't germinated together in a warm environment or on the heat mat.  My seedlings also have a longer period of time in these larger pots before they need to be potted up and most can go directly in the garden.  Am I the only gardener that continually needs to learn you shouldn't try to fix what ain't broke?


Sunday, March 20, 2011

Mud pie season begins today


I love it - the patio is littered with plastic cups, bowls, knives, and garden forks, watering cans, and spray bottles. All evidence that a 6 year old had hours of independent fun while mom got to sow spring veggie seeds.

Tucked into the garden today: baby corn, gai lan (Chinese broccoli), bok choy, atomic red carrots, chantenay carrots, sugar snaps, snow peas, and a lively red spring lettuce mix. French filet beans, edamame, bolita beans, black-eyed peas, red raspberries, and blue potatoes need to go in the ground later. Signs of life in the vegetable garden: yellow raspberries, asparagus, chard, rhubarb, strawberry, and the garlic growing like gangbusters. Around June 15, I'll be harvesting inchelium, early red, ajo rojo, and elephant varieties. Herbs are poking through and greening up: mint (grown in a pot in the ground), thyme, oregano, and I don't think the parsley ever stopped growing all winter. It's now lush and gorgeous.


Indoors - my tiny little orchid that I bought on a whim last year is actually in bloom! These pretty flowers have been open for probably a month. It's shaken my orchid-killer rep and moves me to lovingly care for the orchids I got for free at the National Museum of Natural History's Orchid Show (still running if you're near the DC area).


By the vents and on the heating pads are seeds started last night. Come summer, I will be harvesting: tomatillo, charentais melon, tomatoes (hillbilly, Cherokee purple, isis candy cherry), peppers (ancho, cayenne, jalapeno, habanero), watermelon, and basil.


And my favorite early spring sight - hellebores. How did you spend YOUR first day of mud pie season?

Saturday, July 24, 2010

Got a match?


...neither do I. But I do have these cute little matchbooks containing seeds. I wish I could say I came up with this ridiculously creative gem myself, but I followed the guru herself (or at least her team of gurus), Martha. Here are directions if you'd like to make these adorable seed packets, originally intended to be wedding favors.

Readers who responded to my giveaway last week (now closed) will receive their packages in the mail soon!

Saturday, July 17, 2010

1st blogiversary giveaway!

Chinese wax gourd seeds. The melons develop a waxy coating when fully mature, hence the name. These are also called winter melons, are not sweet, and are typically used in soups.

In celebration of a year of my gardening ramblings and of the people who humor me by actually reading about them, I'm giving away seeds. I'm really humbled and thankful for the people who visit this silly little blog. I've loved meeting fellow bloggers this past year! I could go on about all the meaningful ways in which my life has been affected since I've created this blog exactly one year ago, but then I'd be taking up the space in which I could be discussing this seed giveaway!

Daikon radish seeds. These end up looking like gigantic white carrots and taste much milder than your typical radish. If you have dim sum this weekend, you might want to try the delicious savory radish cakes.

As a small token of appreciation, I'm going to send the first 25 people who e-mail me their names and addresses to wkspray at gmail dot com a sampling of seeds in super cute seed packets I made (I'll post on this later on). Here are the terms: though I've listed the variety of what I have below, I get to choose about 8-10 little seed packets for you. If there's something you really want, I MAY be able to accommodate, based on my limited supply. Just let me know. Also, when I say little seed packet, I mean little seed packet. Don't expect enough to fill your garden next year. Think of it as a sampling of trial sized seed packets.

Chinese long bean seeds - these plants grow on vines. The beans grow by twos and reach ridiculous lengths - they're also known as yard-long beans. They should be picked young and tender though. They are tremendous stir fried!

I know some people do not need/want seeds - if this is you and you've reached this point in this post, please know how much I appreciate you! It's kept me shamelessly posting for 12 months and counting!

*******************************************************

All seeds are organic. Most are heirloom. Some are saved by me or my father. Some are purchased. Most are saved for this year. Some are from last year but still have good germination rates.

Chinese wax gourd
Asian sweet melon (like a small honeydew melon)
Daikon radish
Chinese long bean
Thai eggplant
Luffa gourd (angled)
Luffa gourd (smooth - can be eaten or left to dry for sponges)
Malabar spinach (Chinese vining spinach)
Flowers: Russian mammoth sunflower, cleome, salvia, gomphrena, marigold
Broccoli: early purple sprouting, green calabrese sprouting
Peppers: sweet banana, Thai burapa, sweet red,
Charentais melon (a small sweet orange melon)
Imperial star artichoke, marketmore 76 cukes, butternut squash, tomatillo verde
Selection of herbs: cilantro, giant of Italy parsley, Genovese basil, fine verde basil,
Selection of lettuces: lettuce mix, Swiss chard rainbow lights, mache
Sorry, THIS GIVEAWAY IS NOW CLOSED.

Sunday, March 14, 2010

Seed starting for the backyard gardener and GBBD post


It's the 15th, which means gardeners all over the world are snapping photos for Garden Blogger's Bloom Day. Head over the May Dreams Gardens' blog to see what else is blooming this (almost officially) spring day.


Quiet excitement ensues indoors as well, as yesterday was seed starting day. Though I've tried many different methods, the one I'm about to show you is a near perfected system that fits my needs perfectly. I love all the kits, trays, and other paraphernalia available in catalogs, and have made many an excuse to buy things in the name of "making an investment". Most of the gear I've purchased has gone straight to the recycling bin. Our Master Gardener class speaker last week, Shephard Ogden (founder of Cook's Garden - and in the running for most enthusiastic speaker thus far - and that's saying a lot!), conveyed his fondness for plug trays for seed starting. Though I would love to have trays of seedlings, my biggest issue is that I have a small garden.
Yesterday, I started the first wave of seeds - they included: 3 black krim tomatoes, 3 Japanese black trifele tomatoes, 3 gold medal tomatoes, 3 tam jalapeno, 4 genovese basil, 3 cayenne peppers, 3 pepperoncini, and 6 strawberry fields gomphrena. Now like many people, my seedlings go under grow lights after germination - and as we know, the plants should be VERY close to the light source - about 1-2 inches. The biggest problem with plug trays for a small backyard gardener is that different plants germinate and grow at different rates and heights. If I had a tray of 24 peppers, I would not have an issue. But a tray with odds and ends means shorter plants are not right under the lights - which will certainly lead to leggy plants, which no one wants.


My assistant and I began by adding water to the seed starting mix. A soilless mix is best to use to ensure the environment is sterile for seed starting - cause you know...FUNGUS (if you're following my posts - you know I've become a fungus freak)! It's best to add water because it takes some time for the seed starting material to soak up the water. It will also increase in volume, so I let the mixture sit before filling my pots.


These are leftover pots from when I bought a gazillion a few years ago. When I run out, I will look into cow pots or another similar product made from easily renewable/sustainable materials. I love the size of these pots because they allow plants to grow for several weeks before having to pot up - and many times, they can go in the ground, as is, without have to pot up at all. These pots sit in plastic carry-out containers - a great excuse to order lots of Indian food in the late winter. I jest (sort of ), because these containers have been used for several years now, and will last many more. 6 pots fit perfectly inside the recycled container. The plant tags are 1/4 of a popsicle stick.

Below, the seedlings are covered with Glad Press 'n Seal (just about the only thing this product is good for!). Small vents are snipped in the top. The seedlings sit on a waterproof tray with a flat bottom so they can enjoy the warmth of the heating pad below. I will check on these every day to be sure they're not too sweaty underneath. If so, I'll make more vents or lift a corner. As soon as the seeds germinate, I'll take them off of the heat and put them under the grow light. The ones that haven't germinated will stay put (another benefit of separate pots in the cheap black trays).


This is how my seedlings are set up after they germinate (this photo is from the vault). I love using the separate square pots because I can move them around in different containers depending on how fast they grow, and how tall they get. The lights will stay in one spot, but I boost the short plants up with books so they can all be resting at the same distance from the light. It's not too perty, but it's works perfectly for me. I'd love to hear about your seed starting method too!

**A note on supplies: Space is maxed out at our house. The lights above are just cheapy lights that totally break down after the month they're set up on my piano. From there, the plants go outside to the pop-up coldframe (The Seedhouse), where they harden off. I will also often start some seeds in pots outside in this coldframe. It's sooooo not the cool coldframe complete with antique window that I would love to have, but the space outside is also maxed out and the pop-up coldframe folds into a serving plate-sized bag and hangs in the shed - the antique window doesn't.

Related Posts with Thumbnails