Saturday, August 27, 2016

Homemade fruit leather


When my daughter goes to her ballet classes, I generally go for a long run/walk if it’s nice out, or I’ll read in my car if it’s not. However, before I developed these healthy habits, I used to while away the time at the shopping strip just through the trees from the side of the studio.  This is when I discovered the treasure trove of stuff at Bed Bath and Beyond.  Piled high from floor to ceiling is glorious household stuff – and it’s all stuff YOU REALLY NEED.  There was a point when I bought a new appliance every week – waffle iron, ice cream maker, portable heater, juicer…

Of all the appliances stored in my closet, the food dehydrator has come upon the most use.  As a gardener and frequent farmer’s market purveyor of ripe summer fruits, July/August/September means a lot of delicious drying food is working its way through those dehydrator trays.  A favorite?  Homemade fruit leather. 

You can get complicated with this, and many recipes do. You can add lemon juice to prevent the fruit leather from darkening, there are instructions for straining your mixture, you can add sugar (no!). But the recipe below is all you need to know if you’ve never made fruit leather and want to try:

Fruit Leather Recipe

1) Puree a few soft fruits like the peaches we used here.

2) Pour into the fruit leather tray – right up to the top of the fruit leather tray is fine.

3) Dry until totally leathery. You’ll know when that is (about 6-8 hours?  Food dehydrators are very forgiving and you can’t mess it up!). It won't be wet and you'll be able to lift and peel it off of the tray in one piece. 

4) Peel off the tray.  One side will be stickier than the other.  Stick that side to wax or parchment paper.  That’s it!


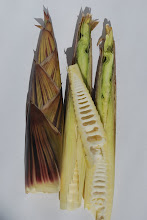
This flexible fruit leather tray sits on top of the slatted dehydrator below.
To make life even easier, place fruit leather tray on the rigid dehydrator tray before filling.


Thursday, August 18, 2016

How to save garlic that's been in the ground too long


I should cross title this post “How to make garlic powder” because that’s the solution.

As you see in the photo above, I had a great garlic harvest.  It just happened to be harvested a few weeks too late!  A combination of heavy rain, intense heat, mosquitoes, and a summer vacation was what did this garlic in.  By the time I was able to dig up the bulbs, the leaves had completely dried up and you can see that most of the papers surrounding the cloves and the whole bulbs, had nearly disintegrated.  I did not think this garlic would store like garlic harvested at the right time would. 

In my freezer is a container of peeled cloves ready to go, and I did not need any more to be added to the already large amount. Fortunately, a Facebook friend happened to complete a project at the exact time I needed a solution for saving this garlic. 


To make Linda’s garlic powder, I sliced the garlic*, dehydrated the slices in the oven on the lowest setting with the door cracked (my food dehydrator was being used at the time), and when fully dry, flaked some and powdered some in the food processor.  Using my oven gave the garlic a more toasted color and flavor than Linda got in a dehydrator, but with garlic, a toasted flavor is ok with me.  As you can see from the jar of Linda’s garlic chips below, her garlic retained a lighter color.  Because she wanted to avoid clumping, she will store the fully dried chips in a jar and flake or powder them in smaller batches as she needs more.


I’m so excited that all this garlic could be saved and am looking forward to using my homemade garlic powder and garlic flakes in dishes throughout the year!

*I have cut garlic many thousands times of times without an issue.  When I did this project, I learned something important – garlic burns! If you look at the amount of garlic I cut, and realize that raw garlic juice was on my hand for a very long time, it makes sense that a mild irritant could really affect the skin.  Shortly after I finished and washed my hands, my left hand started burning pretty intensely.  Intense enough to do some research on garlic burns and get to the aloe plant to use.  The whole-hand burning lasted a good 20 minutes or so, but my left pointer finger and thumb continued to feel swollen and hurt for about 2 days as if I burned them on a hot pan.  Crazy.  Next time I will definitely wear gloves!

Related Posts with Thumbnails